Thursday, August 28, 2014

How To Add IR Sensor To Any Mac Using The Apple Pro Keyboard For Less Than $10

This project was created by "Intell of MacRumors". All credit goes to him; we are simply broadcasting his incredible creation! 

Here's a link to our Instructables Guide: http://www.instructables.com/id/Add-an-IR-Port-to-Any-Mac-For-Less-Than-10/

This mod will basically allow you to get an IR sensor on ANY Macintosh computer using the Apple Pro Keyboard for less than $10. It has a completely stock look and can even benefit users that have an IR port on their Mac already, but the computer is in a place that a remote cannot reach the sensor. If you have any questions regarding this project or need help, simply post in the Comments section here or on the Instructables Project Page.

_________________________________________________________________________________

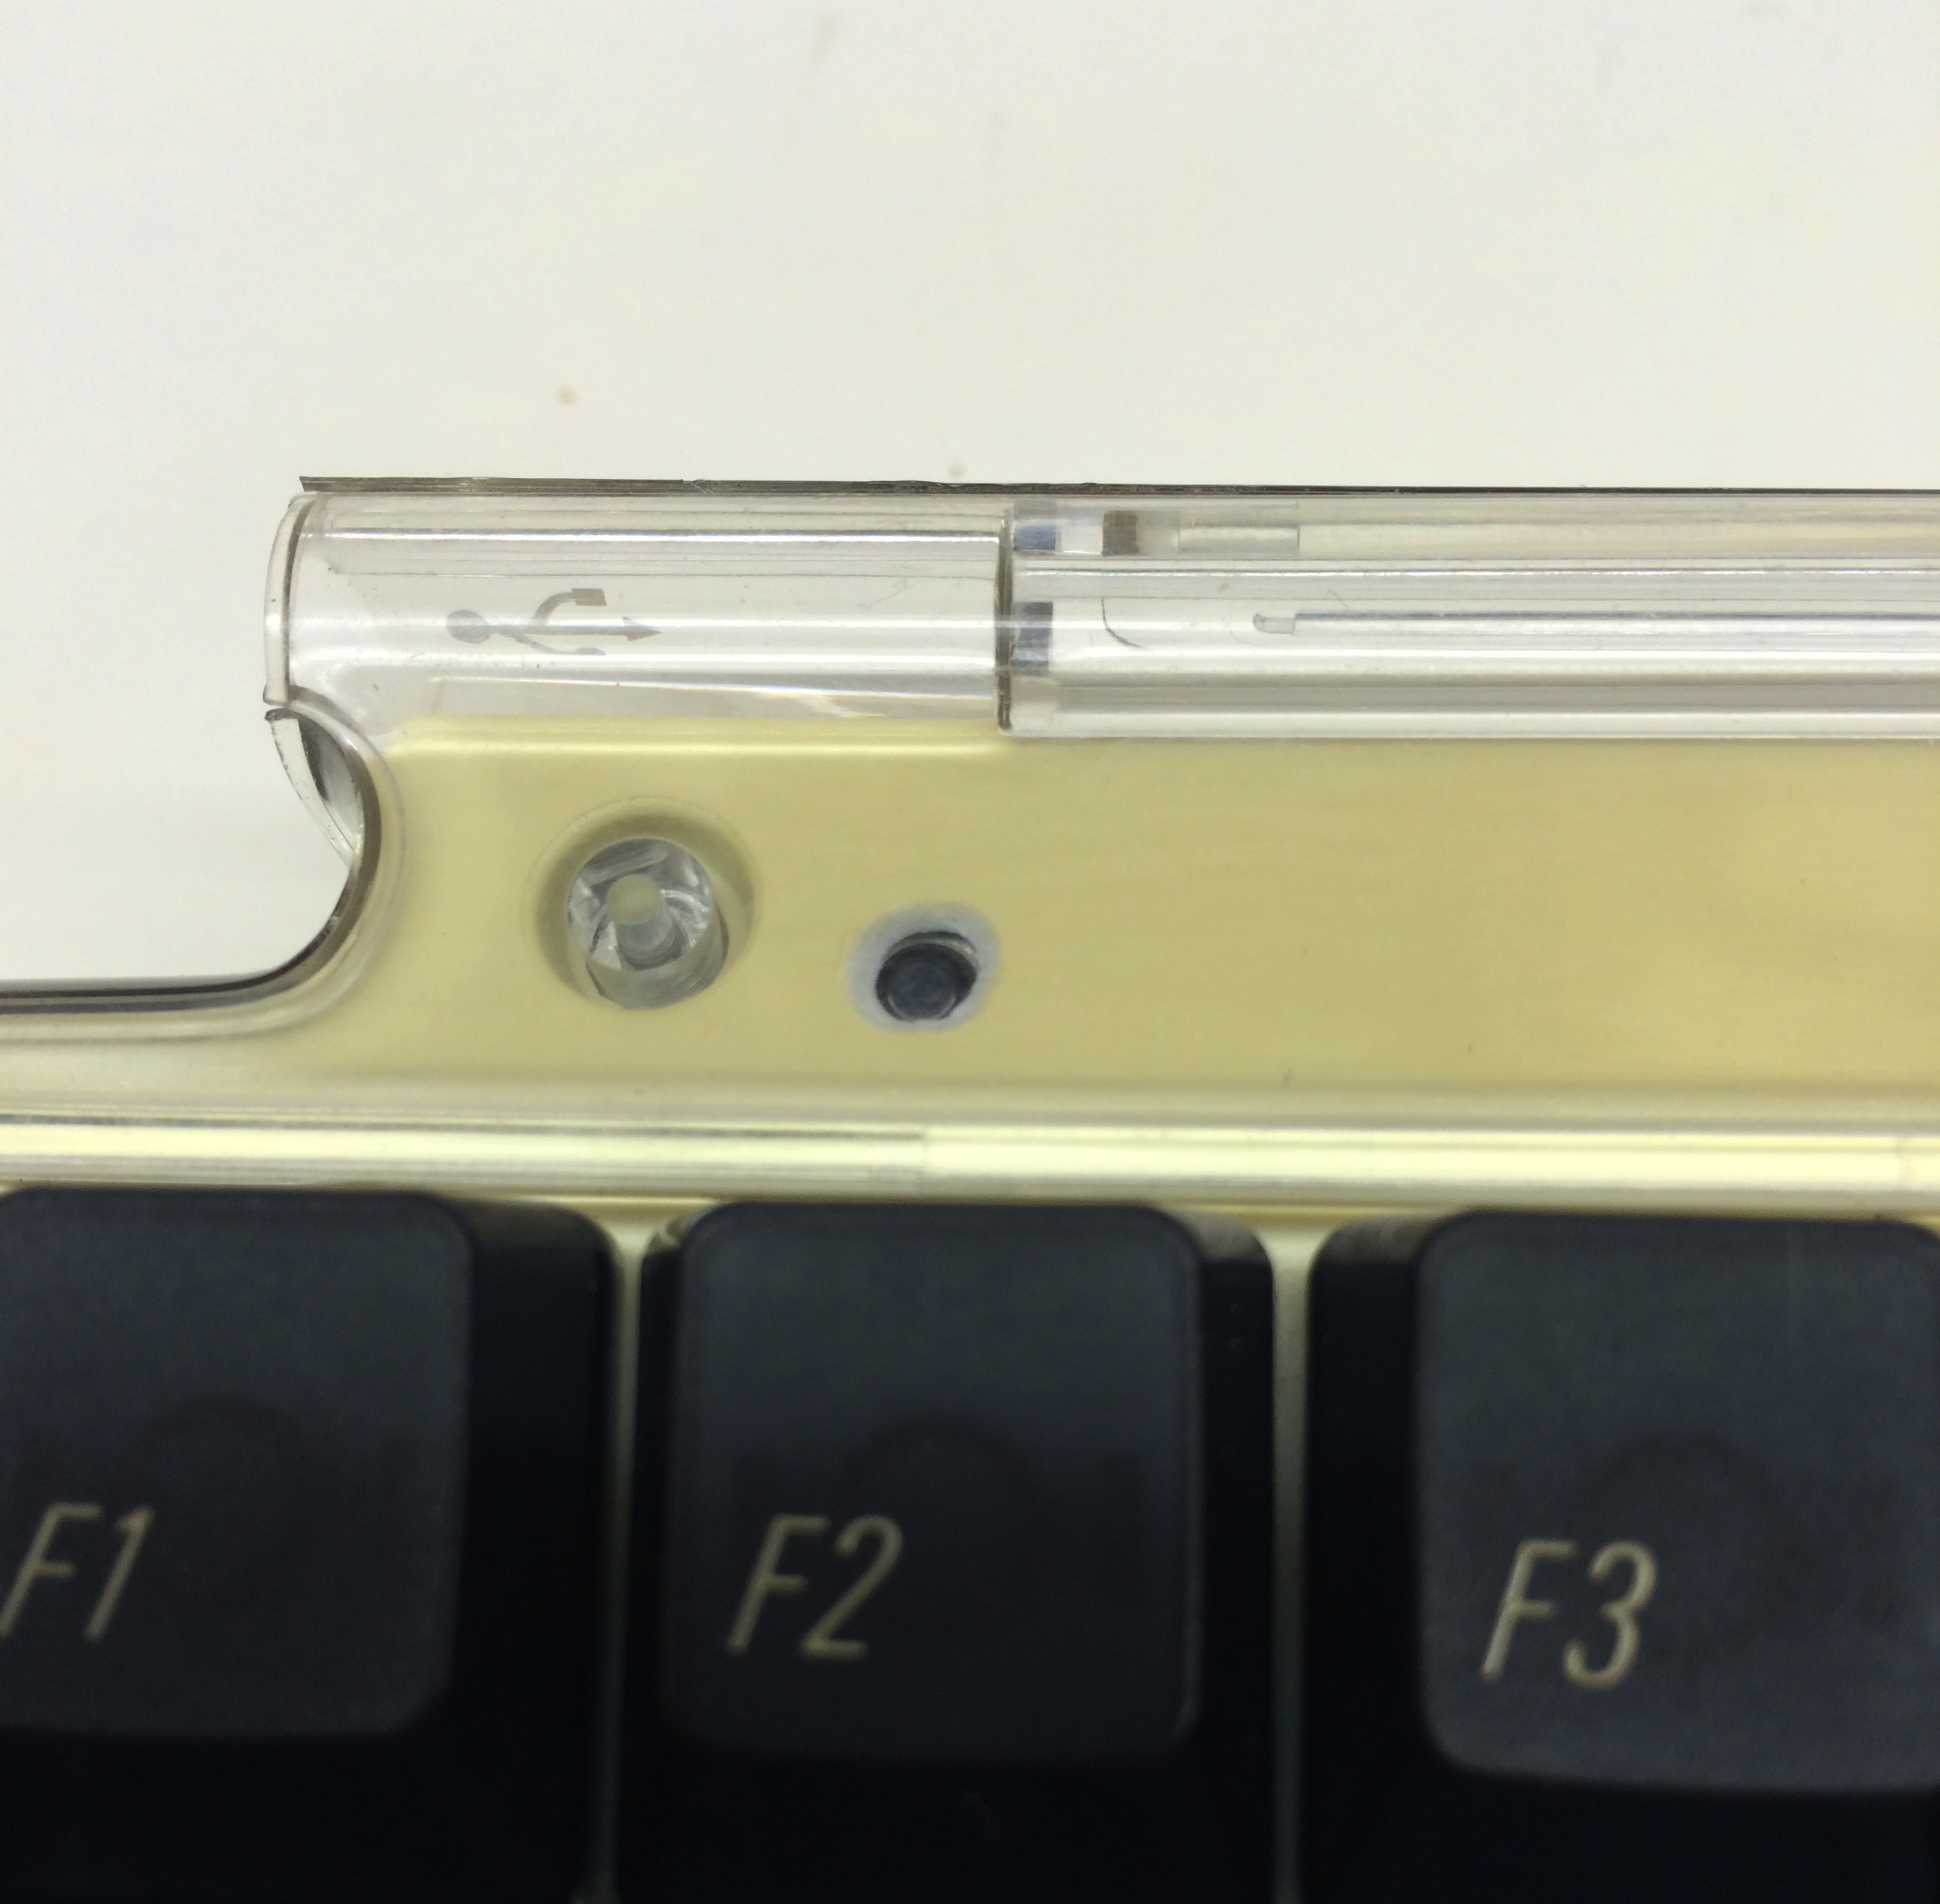
Here's how to install an Apple OEM IR sensor into an Apple USB keyboard. Most of the Apple IR sensors use the internal USB bus. The IR sensor is fully USB compliant allowing you to remove and insert it without a problem. So why not make it external in the keyboard? The end result is a small IR sensor just above the F2 key. It works very well, almost if not as well as a built in Apple IR sensor. Great for an older PowerPC Mac, a modern Mac without an IR sensor, or even to have an extra IR sensor on the same Mac. I think this is because the keyboard's plastic case acts as a lens or conduit for the IR light to get to the sensor.


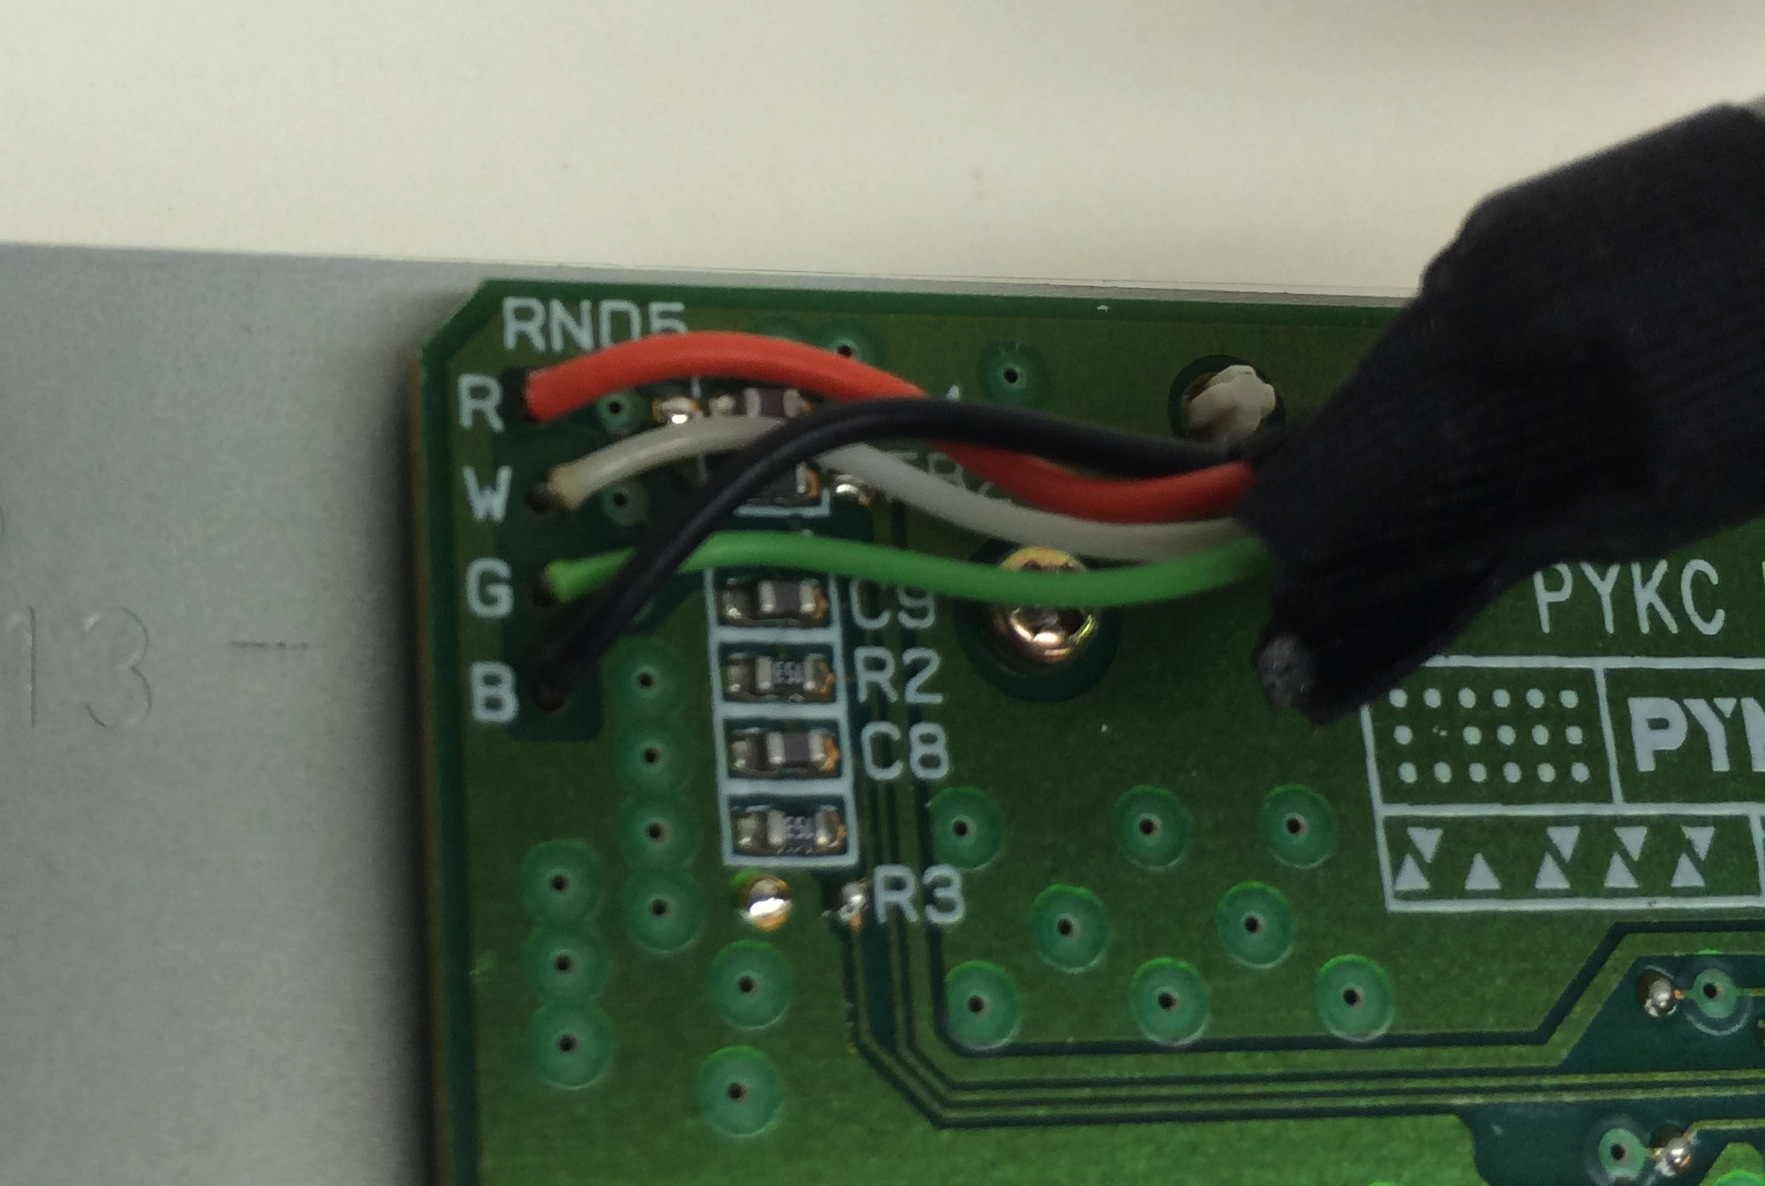
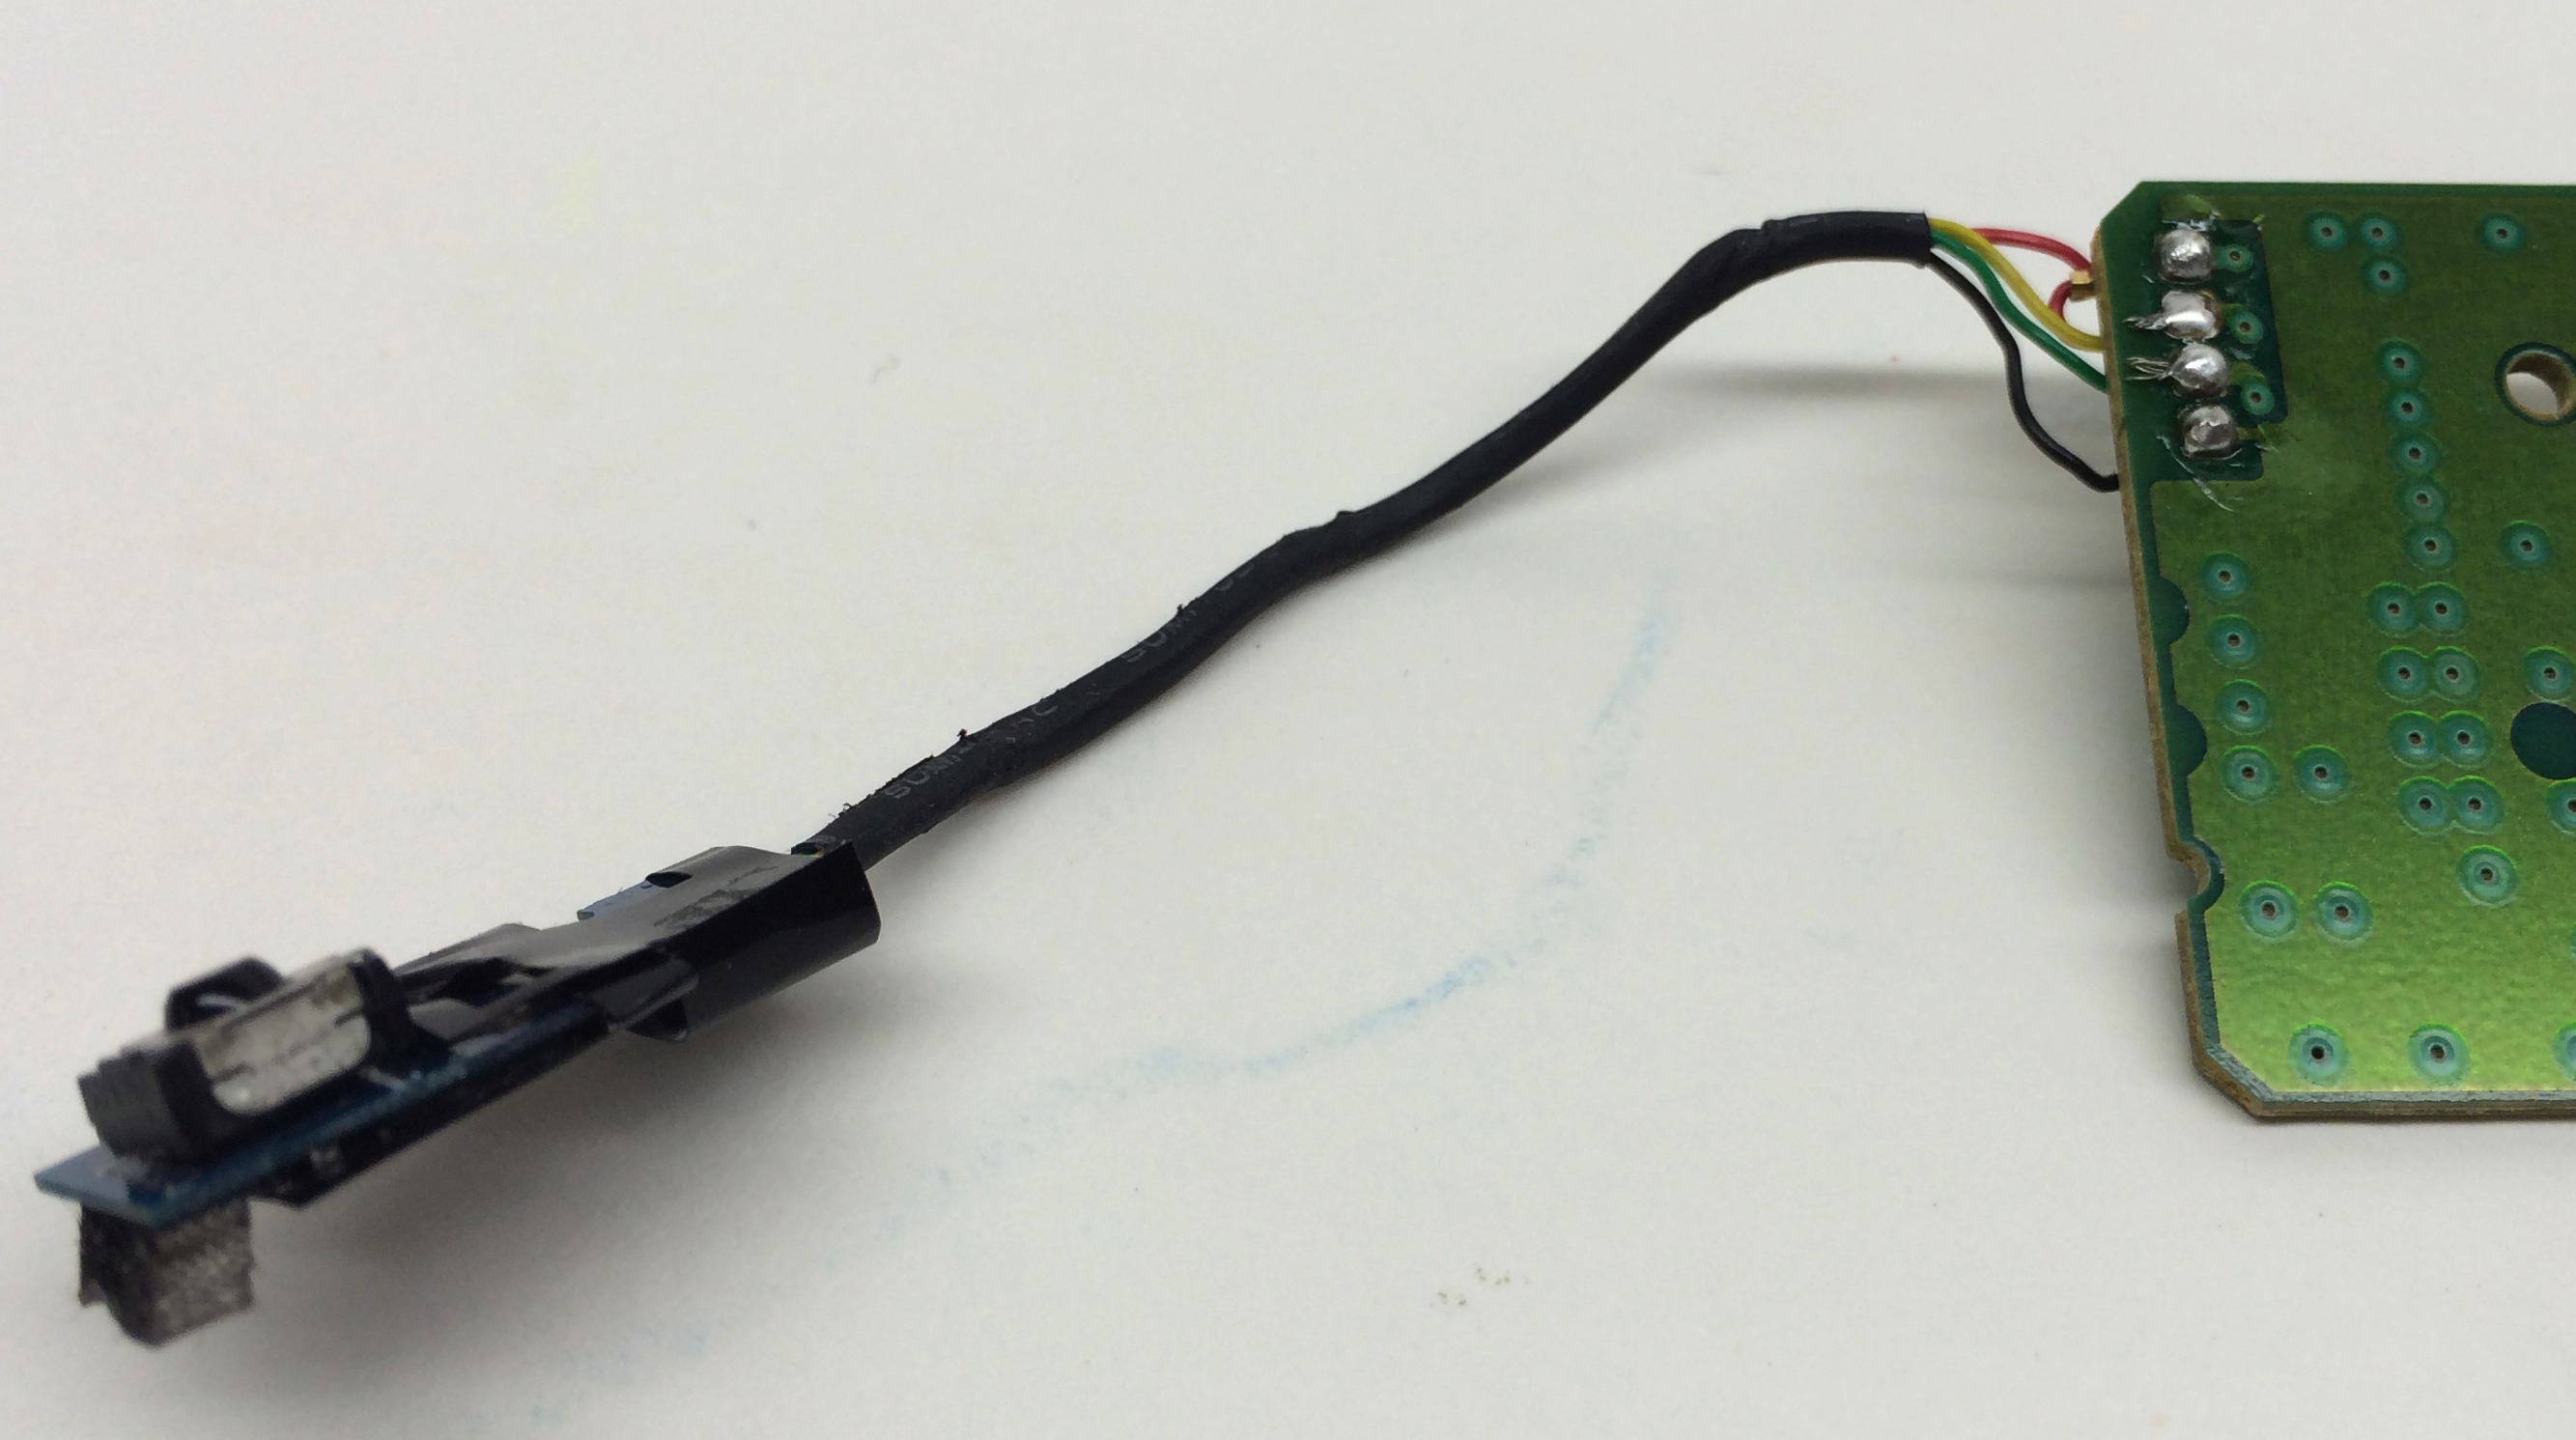
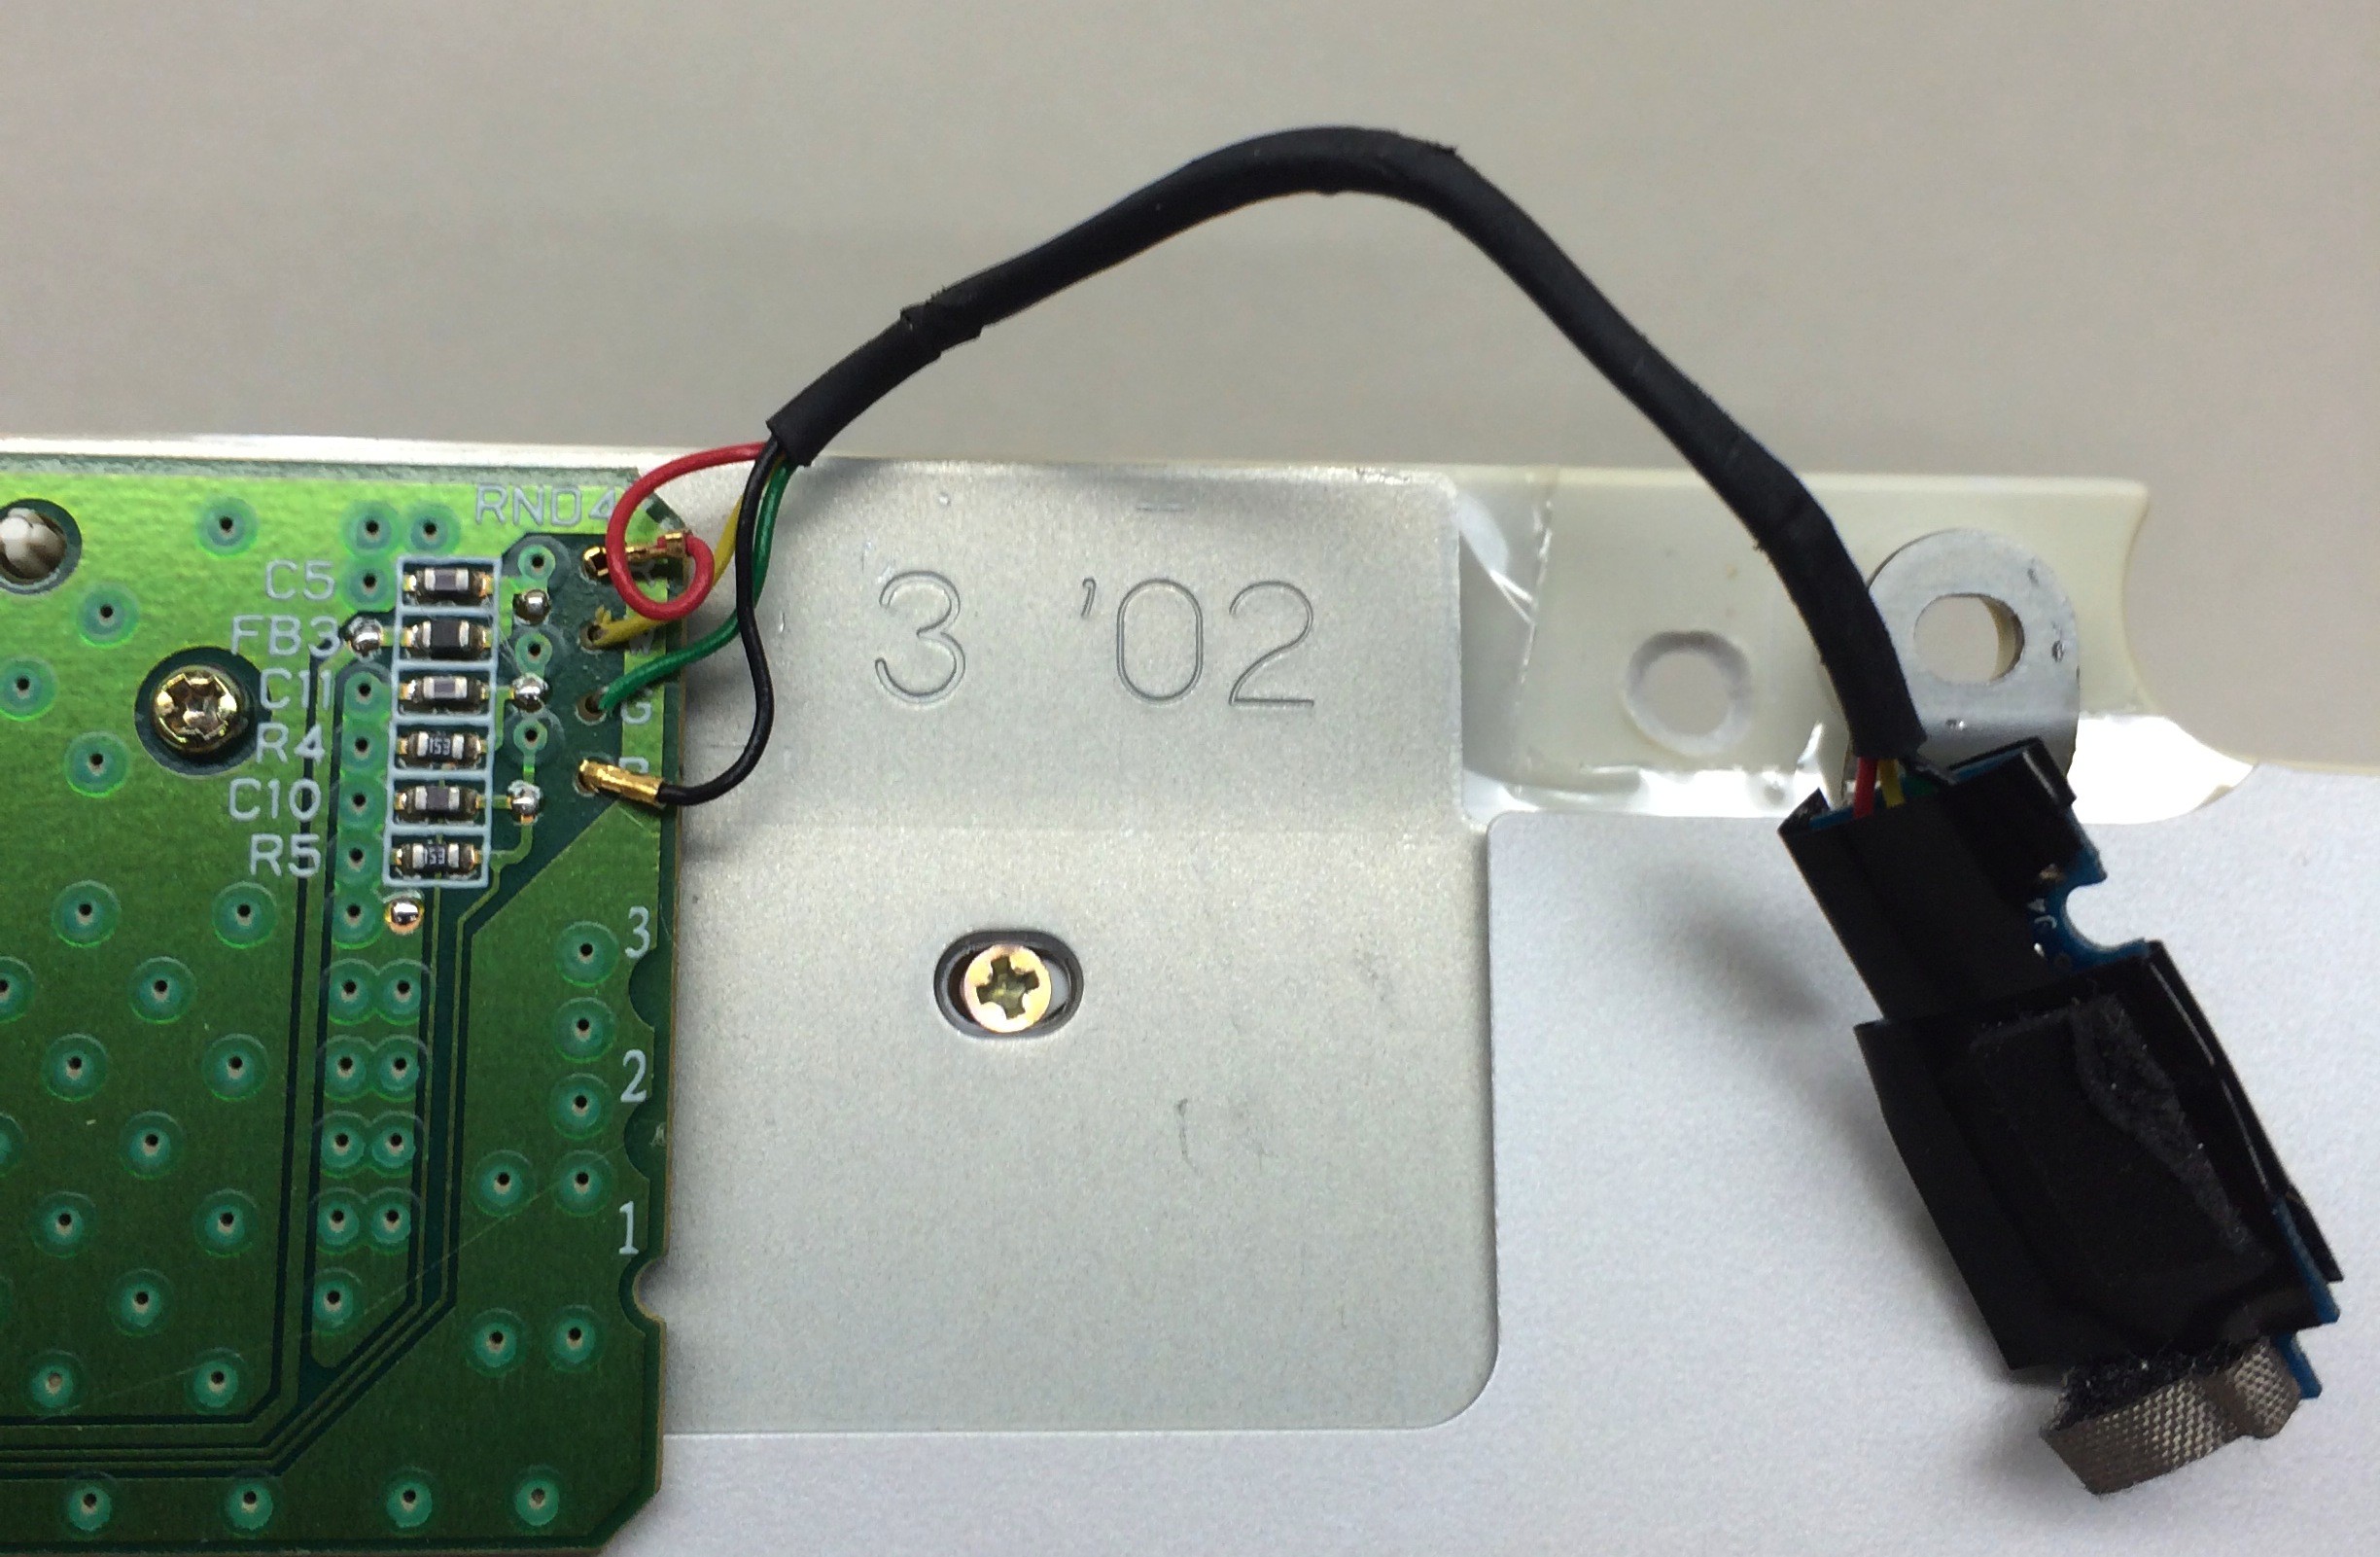
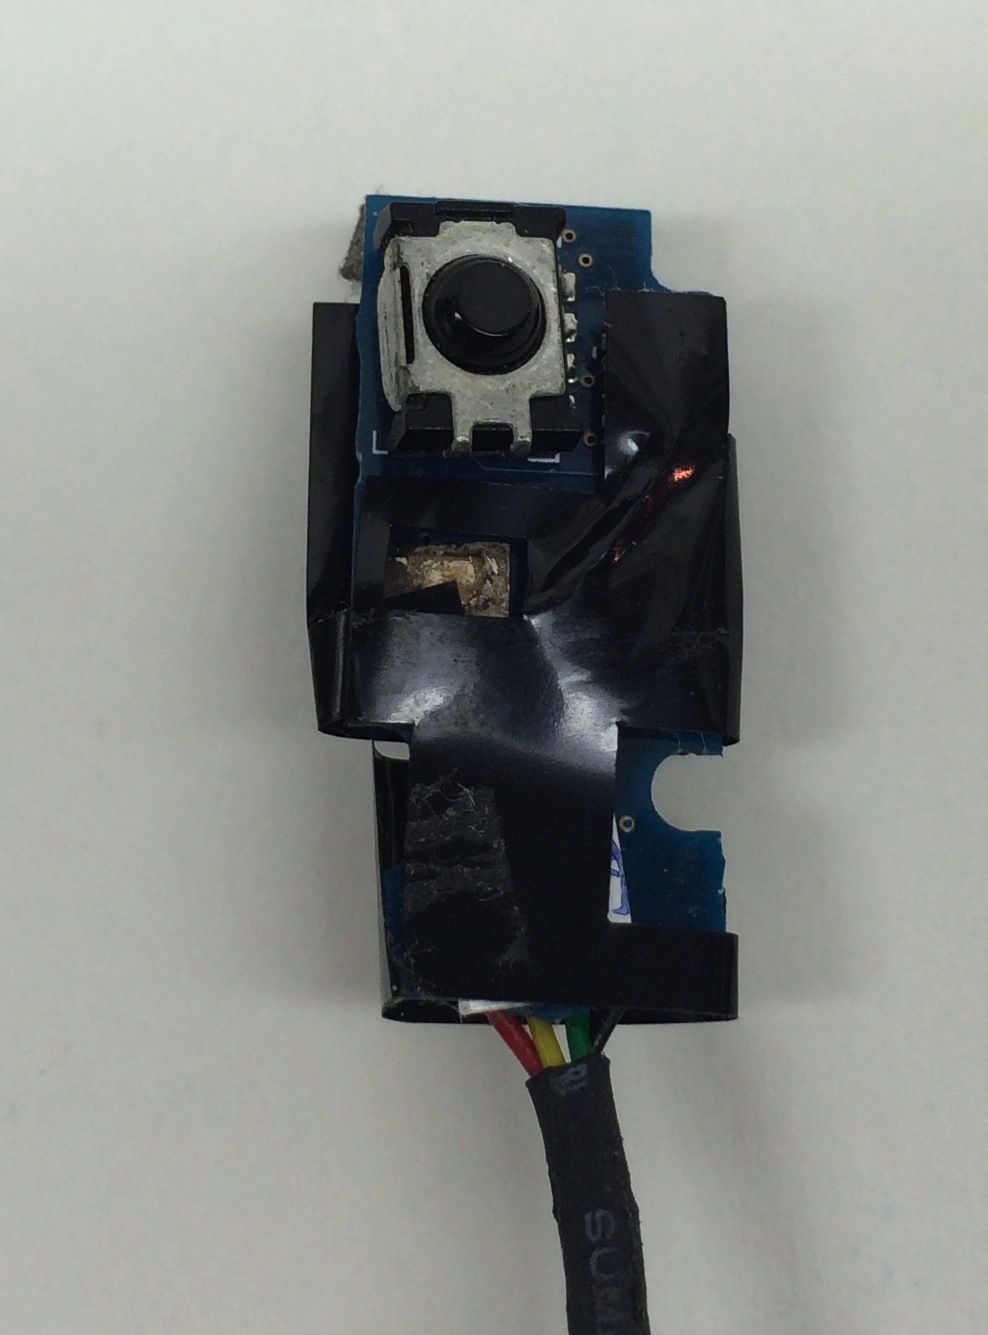
The IR sensor board I used is part number 922-7195. I chose this one because it's cheap (less than $10), has wires attached to it, is small, and has drivers built into 10.4 and newer. Once done, you'll have native Apple Remote IR abilities with your machine. With it you can control iTunes, Plex, and other Apple Remote enabled applications. You can even sleep and wake the machine via the Apple Remote. This will work with any of the plastic wired Apple USB keyboards. Possibly the aluminum models as well, but it'll require more work to open and seal them again. I have not done it to the iMac G3 style with a built in power button, but it should work on that model as well. This outlines the instructions for the Apple Pro keyboard (M7803). All pictures are thumbnail size, click to embiggen.

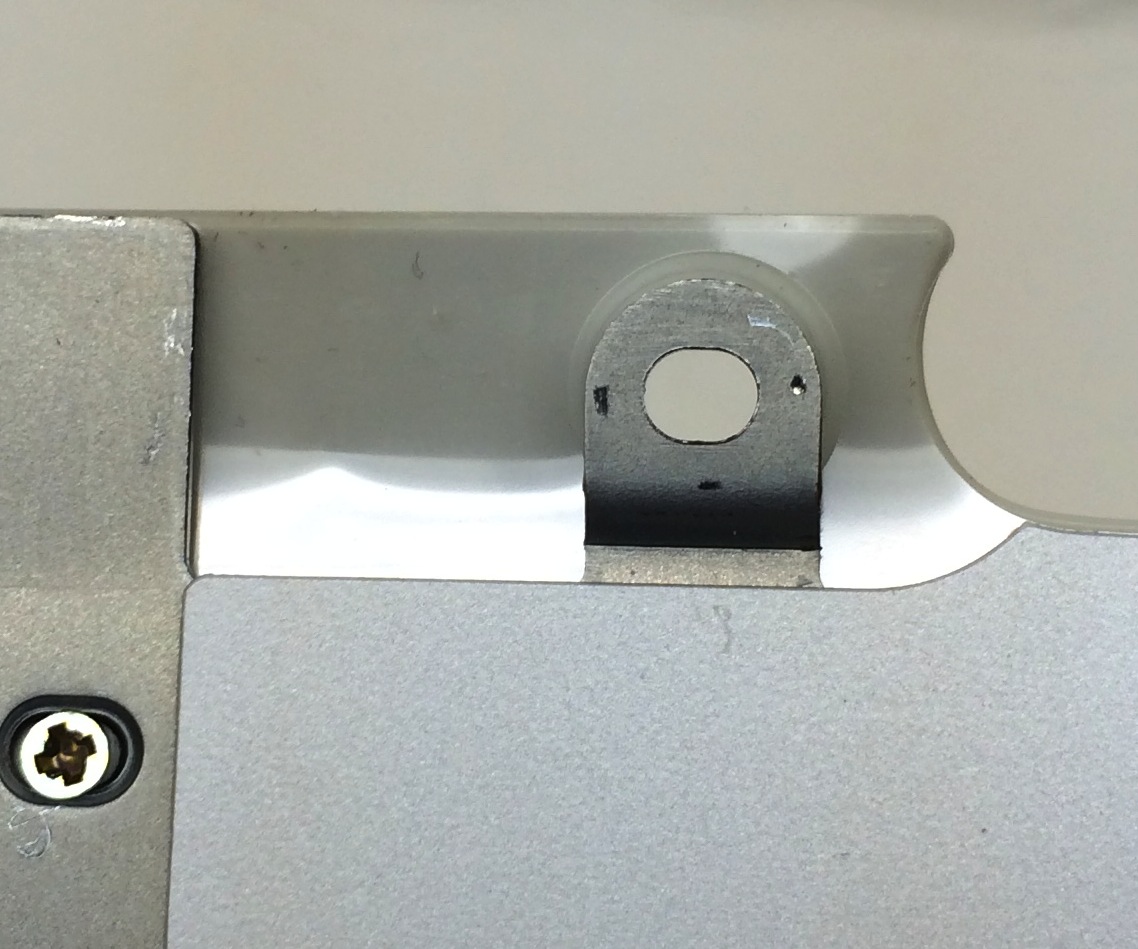
Remove the four Torx 5 screws and the one Phillips from the back of the keyboard. Note the Philips head is under the label sticker. Remove top plastic frame. It is held in by clips along the top and bottom of the keyboard. Remove three Phillips head screws from under the caps lock, semicolon, and keypad number 6 key. Before lifting out the keyboard from the bottom tray, remove the two securing screws and cable cover where the USB cable goes into the keyboard. Remove grounding screw near USB cable and seven screws securing the circuit board to the keyboard. Remove circuit board from back of keyboard.

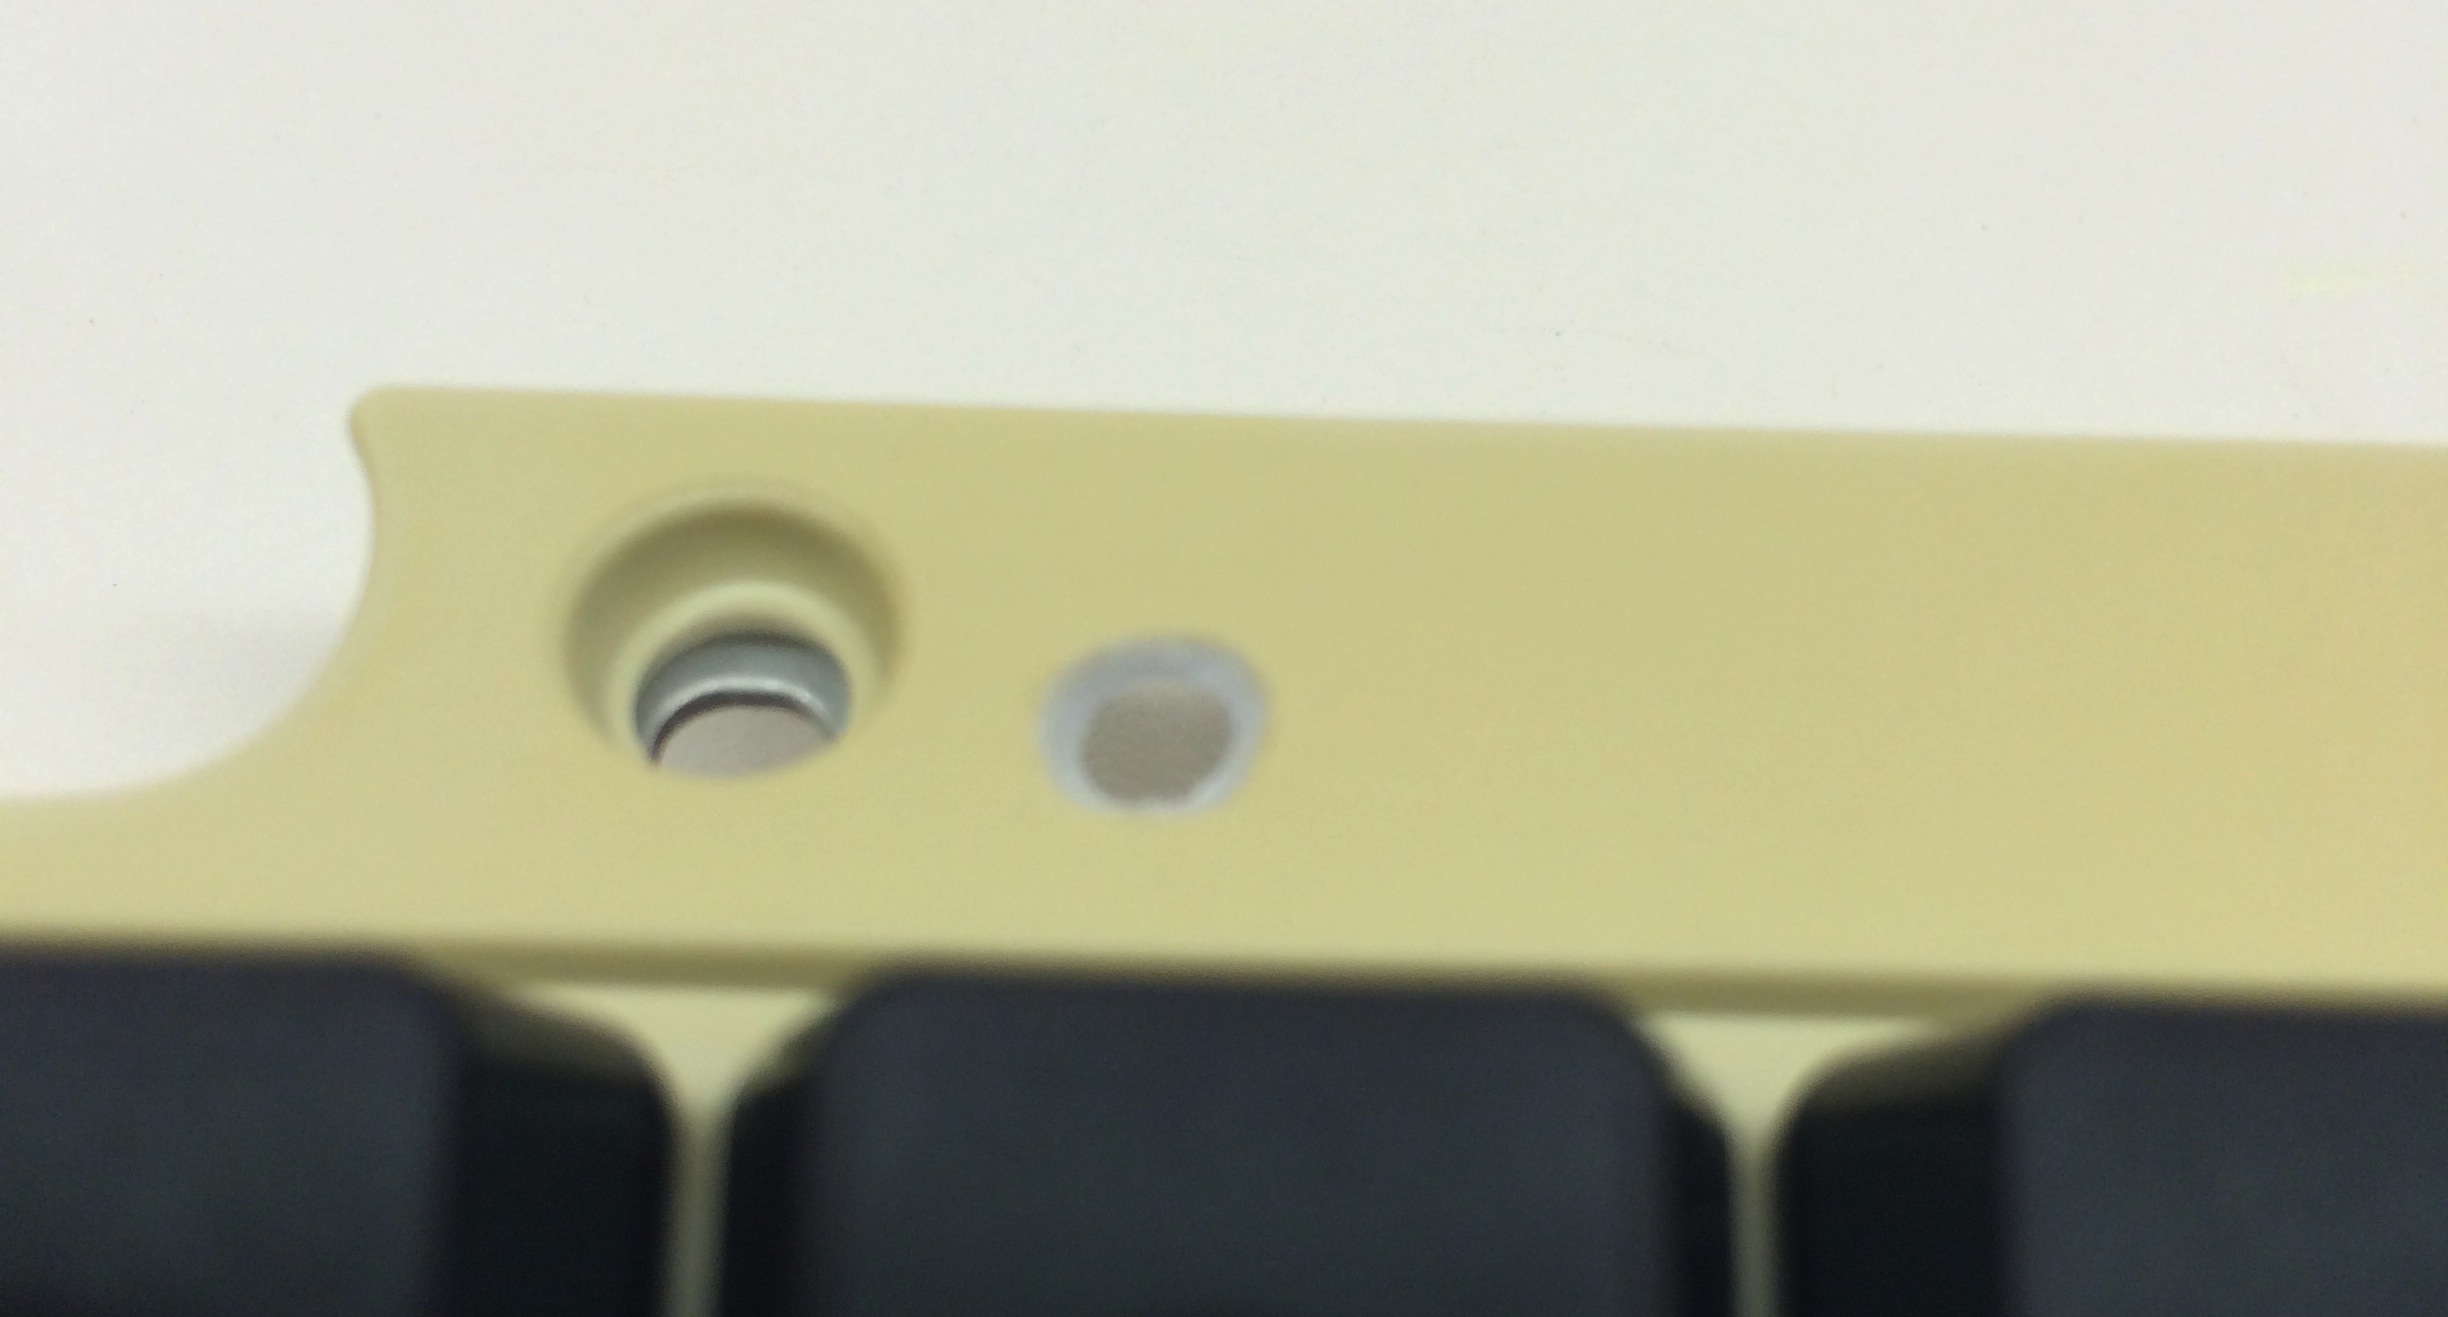
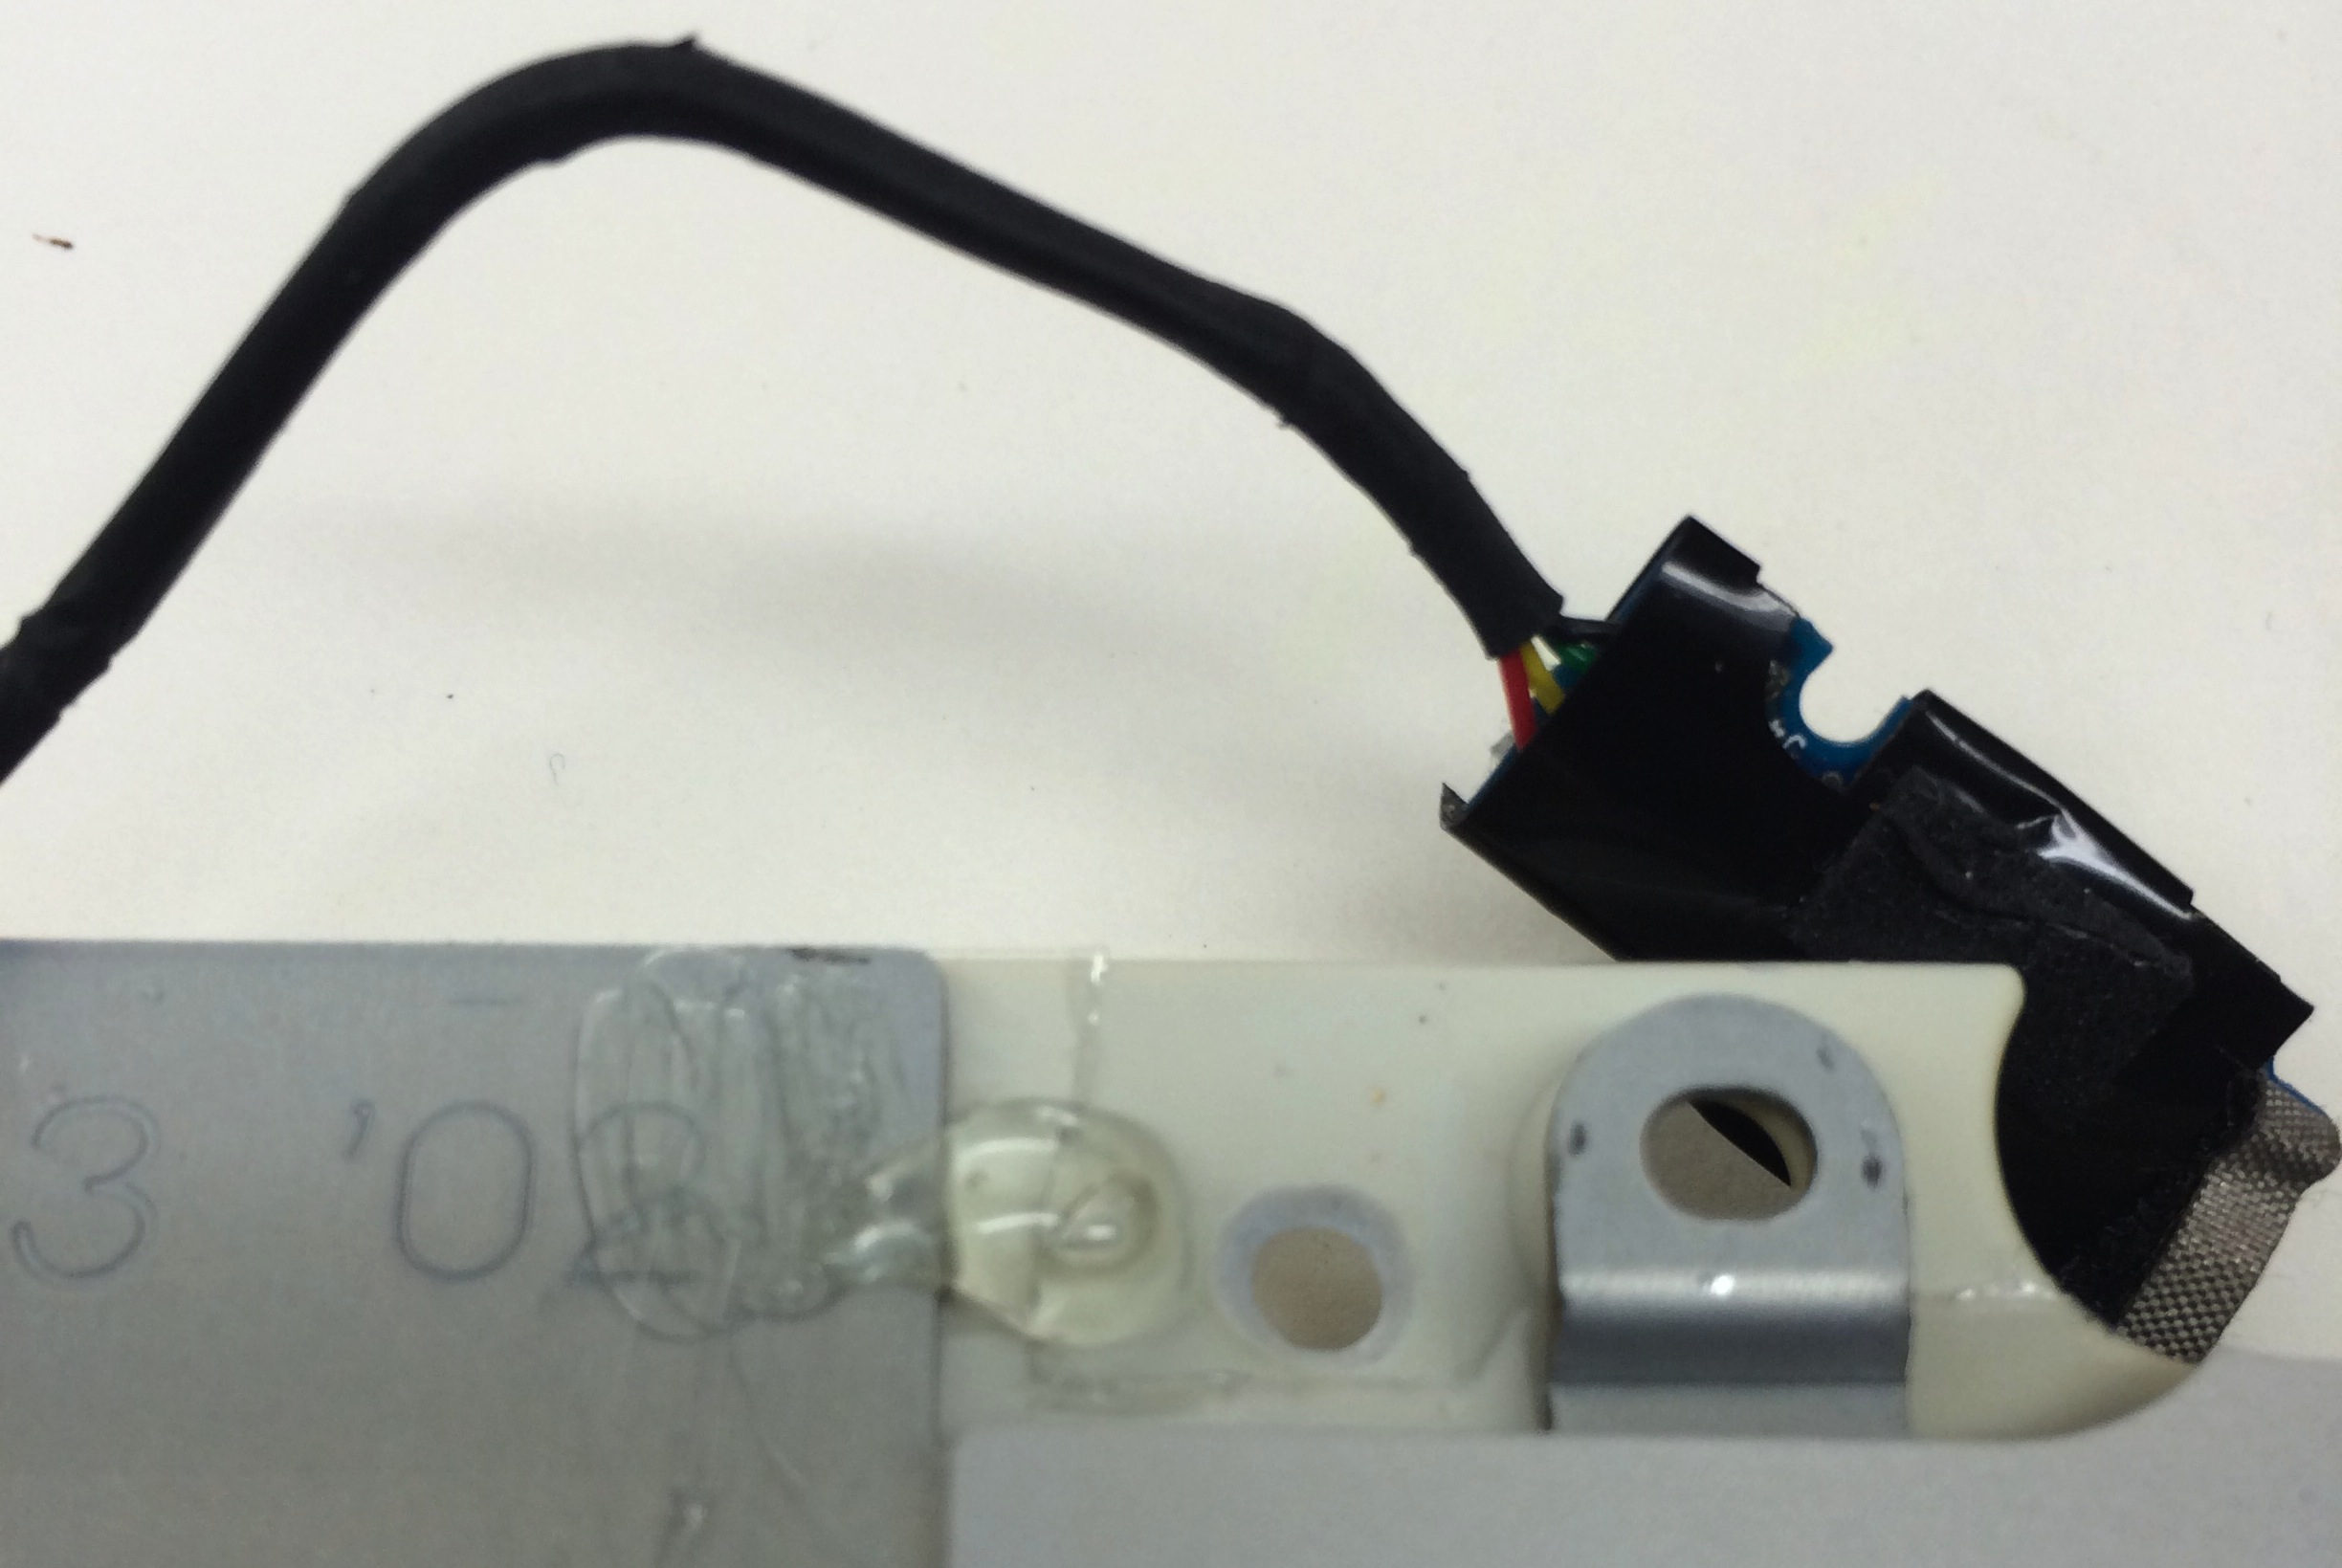
Take a dry erase marker and mark the top of the IR sensor. Quickly take the sensor and position it so that the sensor body is in the corner against the USB port mount and the metal backing on the keyboard and press down lightly to transfer the dry erase ink.


Clean the IR sensor. Slowly drill a small hole from the inside portion of the keyboard to the outside where the mark you made is. The hole should be the same size as the dome on the IR sensor.


Once through, bevel the outside hole to allow the IR sensor to have a wider view. 


Desolder (or cut off) the USB port on the opposite side of the USB port that you plug the mouse into. Discard or save the USB port, we will not be needing it. 


Remove the white plastic connector and gold pins from the IR sensor cable. Strip the wire to about 2-3mm of bear wire. Insert the IR sensor's wires from the same side of the board as the USB ports' wires originally went and solder them to their corresponding colours as labeled on the circuit board. Note: The green wire goes to the white hole.


Once it is cooled, check your work for any shorts in the solder. This is a good time to check if the connections are good the and sensor is working. Plug it into any Mac running 10.4.8 or higher. Check the USB section of System Profiler for the IR sensor on the keyboard's USB hub. If you don't see it, try re-soldering the connections. Screw the circuit board back onto the keyboard.


Put a small dot of hot glue onto the plastic just to the side of the hole made earlier.


Take the IR sensor board and press it onto the glue so the that IR sensor dome is in the hole. While still holding the board, flip the keyboard over and move the IR sensor dome for optimal range by aligning it to be in the centre of the hole. Keep holding until the glue has cooled, about 30-60 seconds. 


Move the IR board's cable so that it is tucked under the circuit board to prevent damaging it when closing the keyboard. 


Using a pair of pliers, bend the corner and wall of the metal tray in the bottom of the plastic keyboard shell so that it does not hit or damage the IR sensor. Make sure you bend the correct side of the tray.


Reassemble keyboard. Additional pictures: 


The 922-7195 IR sensor board. About as big as the middle part of your pinky finger.


The USB port that gets sacrificed and removed.


Saturday, November 23, 2013

How To Read Bottle Cap Code Without Opening


This is a simple tutorial on how to read the code underneath a bottle cap without actually opening the bottle. We use the LED on an iPhone to create a reflection onto the surface of the soda, which you can then easily read. You can use an App on your phone to automatically flip the image since it will be backwards, or you can just read the code backwards. This is very helpful for the "Every 2 Minutes" Promotion so you can read the codes without having your soda go flat.

Check out our Social Media sites and Blog!

Blog: www.UnconventionalHacker.com
FaceBook Page: www.FaceBook.com/UnconventionalHacker
Twitter: www.Twitter.com/UnconventionalH
YouTube Channel: www.YouTube.com/UnconventionalHacker

Thursday, September 27, 2012

NES Cartridge Hard Drive and Console Dock

We now have a tutorial for our NES Cartridge Hard Drive and Console Dock!

Check it out on Instructables!

http://www.instructables.com/id/NES-Cartridge-Hard-Drive-and-Console-Dock/

Thursday, August 23, 2012

Unconventional Hacker Store Now Open

We have officially opened our very own store! Check it out by clicking here or the store tab at the top of the page. If you have any questions or specific requests, please let us know in the comments section!

Tuesday, August 14, 2012

Retro Wireless Apple Mouse

We will post the tutorial here once the contest is over on Instructables. Until then, please go to our Instructables Guide and vote for us in the Fix It & Improve It Contest!

http://www.instructables.com/id/Retro-Wireless-Apple-Mouse/

Tuesday, May 24, 2011

NES Cartridge Hard Drive and Console Dock

This is just a rough post on the Cartridge Hard Drive and System Dock that we created today. We will have a more appealing setup and video later on, we just wanted to get this thrown up there as soon as we got it finished. Any questions or wanna know more details, let us know in the comments!


Like I said, we'll have another post up soon with more information on this project and we should also have it on Instructables as well.